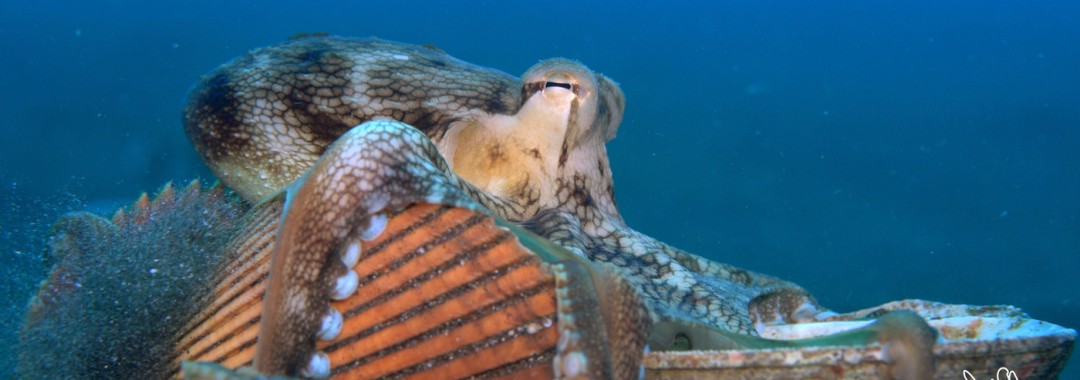
In the last few months we’ve been very lucky and have had an extraordinary number of coconut octopuses (Amphioctopus marginatus) on dives in Lembeh. These intelligent critters are the only mollusk known to use tools, and everyone who sees them agrees they have the most fascinating behaviour! Other awesome sightings included harlequin shrimp, hairy frogfishes galore and the rare magnificent shrimp goby with its sail-like dorsal fin and dapper red-and-white partner shrimp. We hope you enjoy the video as much as we do!
Tag Archives: underwater photography

Critters of the Lembeh Strait | SEA WARS – The Flamboyant Cuttlefish Strikes Back (Part II)
In part I of this series, we saw a newly hatched flamboyant cuttlefish (Metasepia pfefferi) getting snatched up by a small mantis shrimp, a surprising choice of meals since they are widely (but perhaps wrongly) believed to be toxic. In this latest episode II, we see a reversal of roles when an adult flamboyant cuttlefish snatches a mantis shrimp to feed on, so it’s not always predictable who is the hunter and who is the prey between these 2 species! The slow-motion part of this underwater video shows in amazing detail how the flamboyant carefully extends its two feeding arms, then at lightning speed grabs its prey and grips the mantis with its suckers, waiting until the mantis tires before consuming her crispy crustacean meal.
Critters of the Lembeh Strait | SEA WARS – Flamboyant Cuttlefish vs. Mantis Shrimp (Part 1)
Flamboyant Cuttlefishes have the reputation of being highly toxic, but newer studies show that it might not be true and more research has to be done. Unfortunately the action in this video was so fast and unexpected, that I could not see what happened after the attack.
Tips For Underwater Photographers – Fluorescent Photography
UV or fluorescence dives are becoming more and more popular and many dive resorts offer them as part of the experience.
Doing fluorescence dives can be very different than normal dives, and the fluorescence is best appreciated on night-dives.
How to shoot fluorescence underwater?
There are different ways to do fluorescent photography; one way is to use a UV or fluorescent focus/video light to look for subjects, fluorescence filters on our strobes, a yellow filter on our camera and a yellow filter on our mask and the other way is to just use UV lights and a yellow filter on the camera (and mask) and no additional strobes. Because of all these filters the light is not that strong in the first place and we need to use different settings on our cameras. High ISO numbers, large apertures (low f-numbers) and slow shutter speeds are typically needed to be able to see something in our images.
Shooting with strobes
Strobes with fluorescence filters strapped on are stronger than UV lights, allowing us to choose lower ISO numbers, faster shutter speeds and smaller apertures, but we still cannot shoot with our typical macro settings…I usually start off with something like ISO 800-1600 , f8, 1/60sec, take a test-shot and then adjust accordingly…sometimes we need to boost the ISO up more to get the desired depth of field, but that can introduce noise (newer cameras can handle very high ISO numbers without having too much noise)
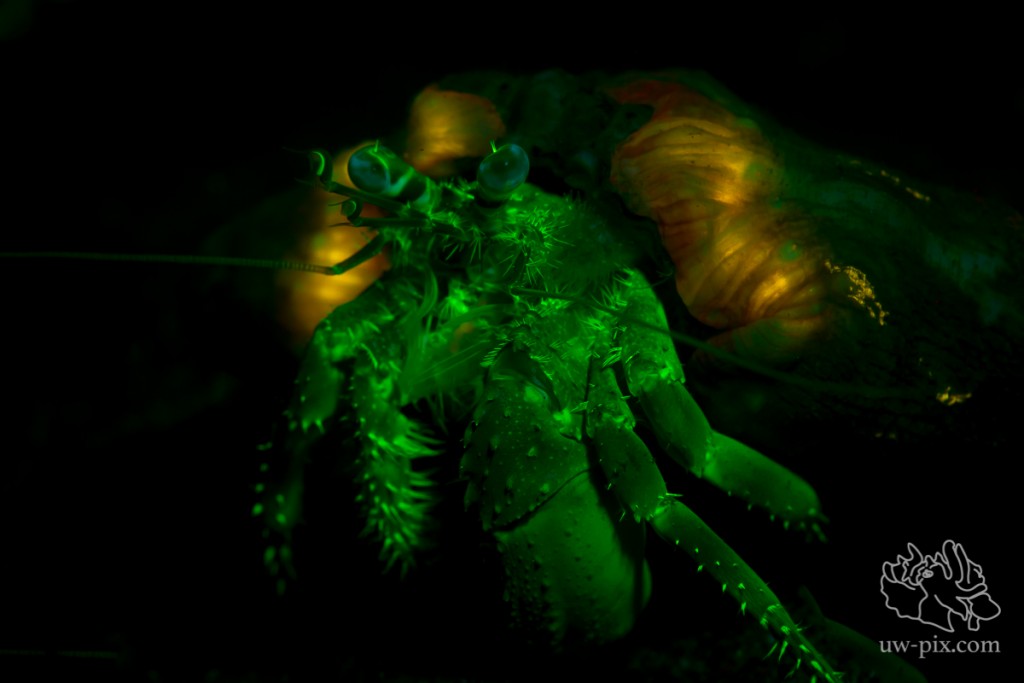
Hermit crab – Canon 7D, 60mm macro, ISO800, f7.1, 1/60sec, 1x i-Torch Pro6 as focus light, 1x INON Z240 with fluorescence filter strapped over the strobe
Shooting with video lights:
Many video and focus lights nowadays have the UV function built in. If you don’t want to invest in the fluorescence filters for the strobes it is possible to use only the UV lights to get some good shots as long as the subjects are small. A good starting setting there is around ISO800-1600, f5, 1/30sec and then adjust according to the subject…for moving subjects use a faster shutter speed.

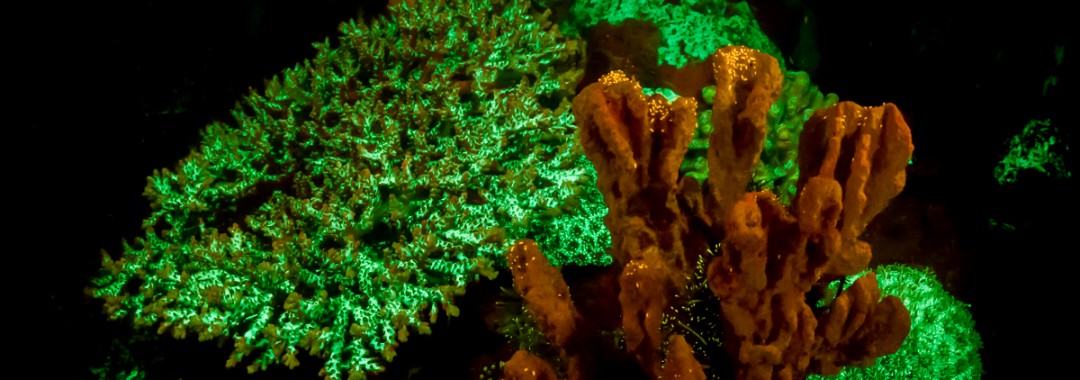
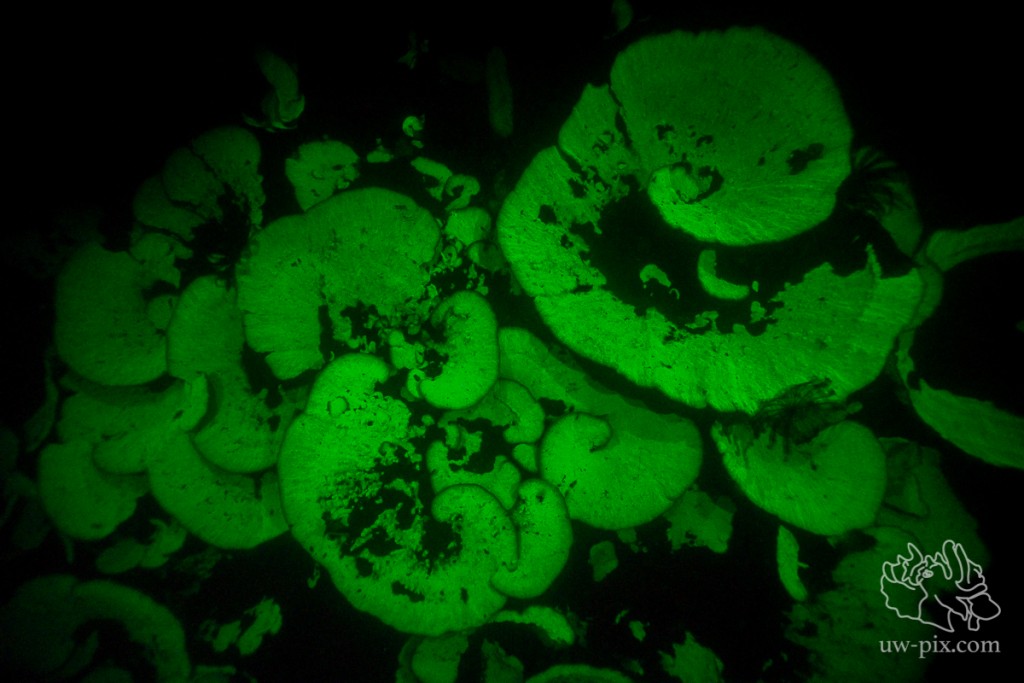
Mushroom coral – Canon 7D, 60mm macro, ISO800, f4.5, 1/30sec, 1x i-Torch Pro6+, 1xi-Torch Pro 7 with fluorescence filter strapped over the light
Galaxea coral – Canon 7D, 60mm macro, ISO800, 1/30sec, f4, 1xi-Torch Pro6
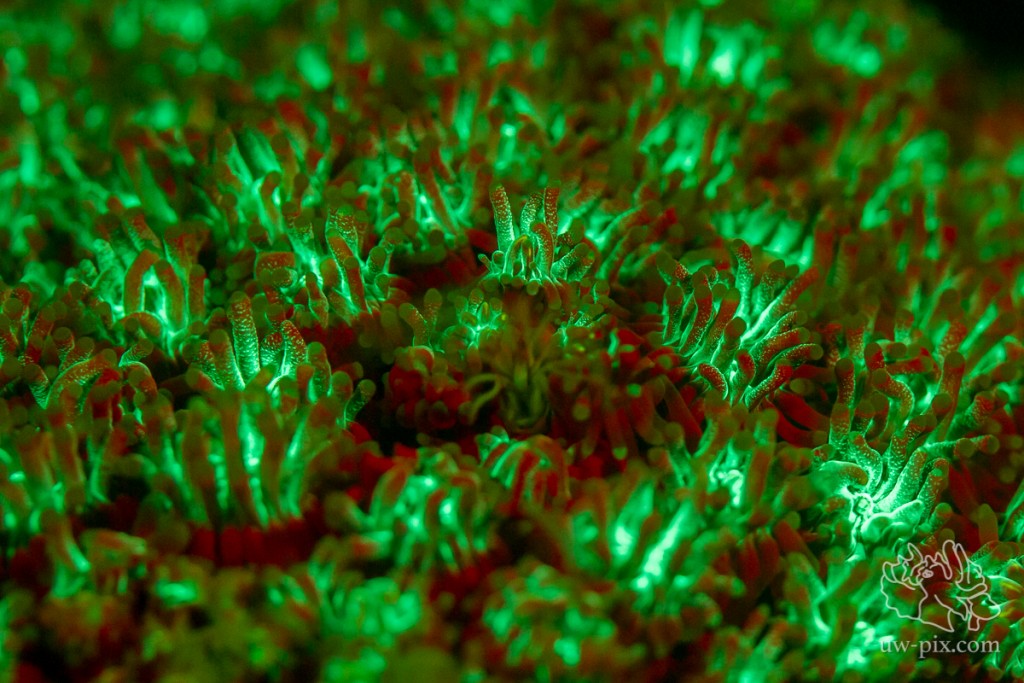
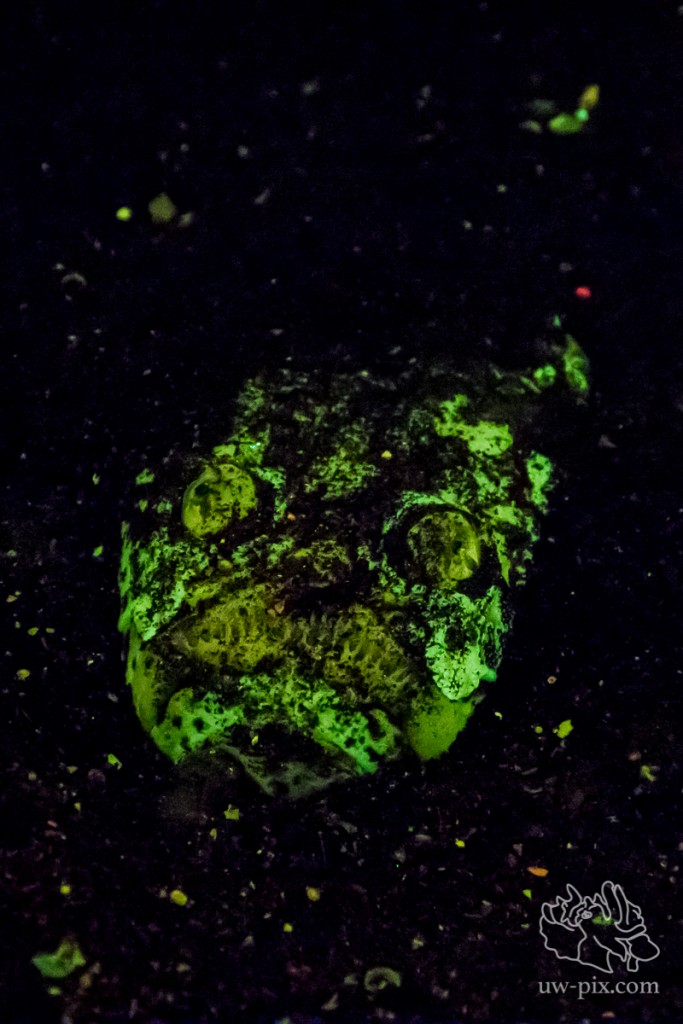
It is easiest to photograph corals and anemones as they don’t move much, but a lot of the critters here in Lembeh are fluorescent as well…
Stargazer (Uranoscopus sp) – Canon 7D Mark II, Tokina 10-17, Kenko 1.4 TC, @17mm, ISO640, f7,1, 1/60sec, 2xi-Torch Venom 50
Wrasse – Canon 7D Mark II, 60mm macro, ISO640, f5.6, 1/125sec, 2x i-Torch Venom 50
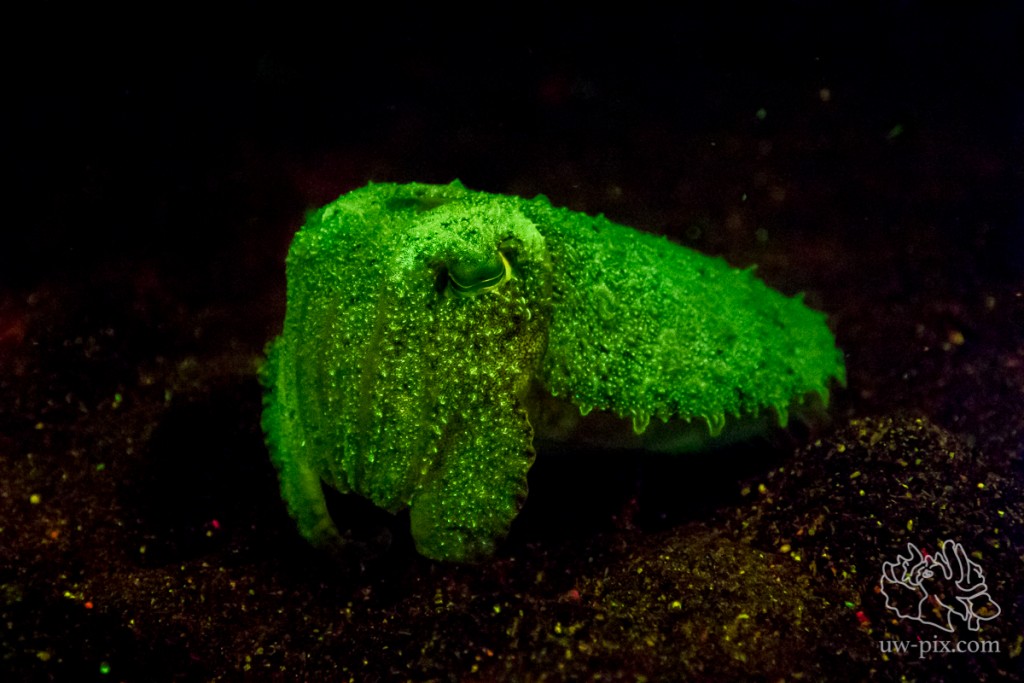
Needle cuttlefish (Sepia aculeata) – Canon 7D Mark II, Tokina 10–17mm, Kenko 1.4x TC, ISO 16000, f/6.3, 1/30s, 2x i-Torch Venom 38
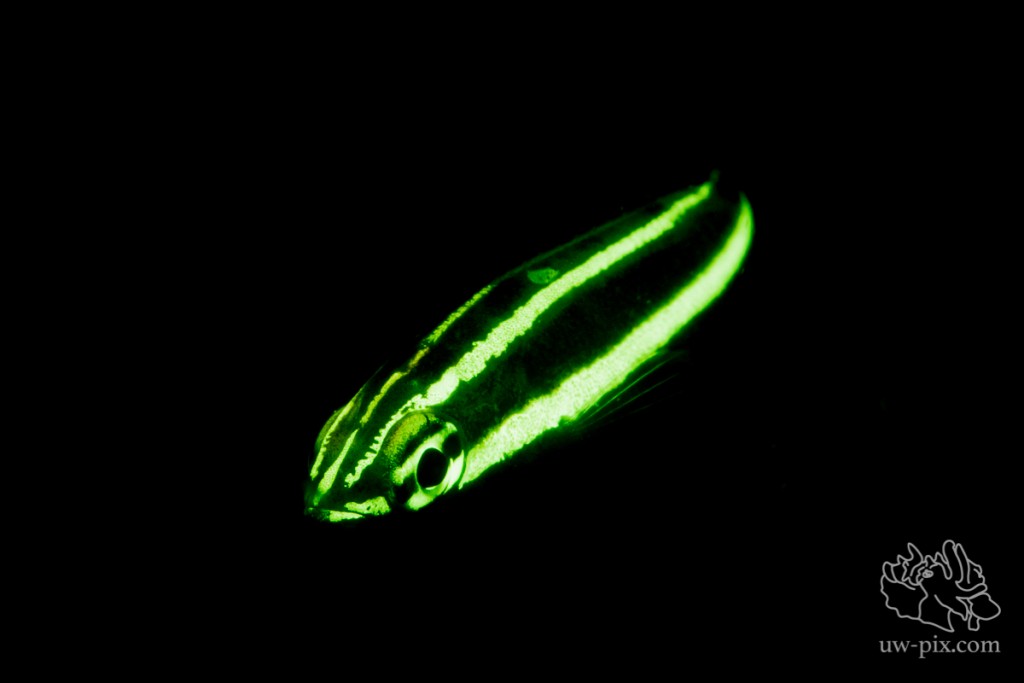
Lizardfish – Canon 7D, 60mm, ISO640, 1/30sec, f5, 1x i-Torch Pro6
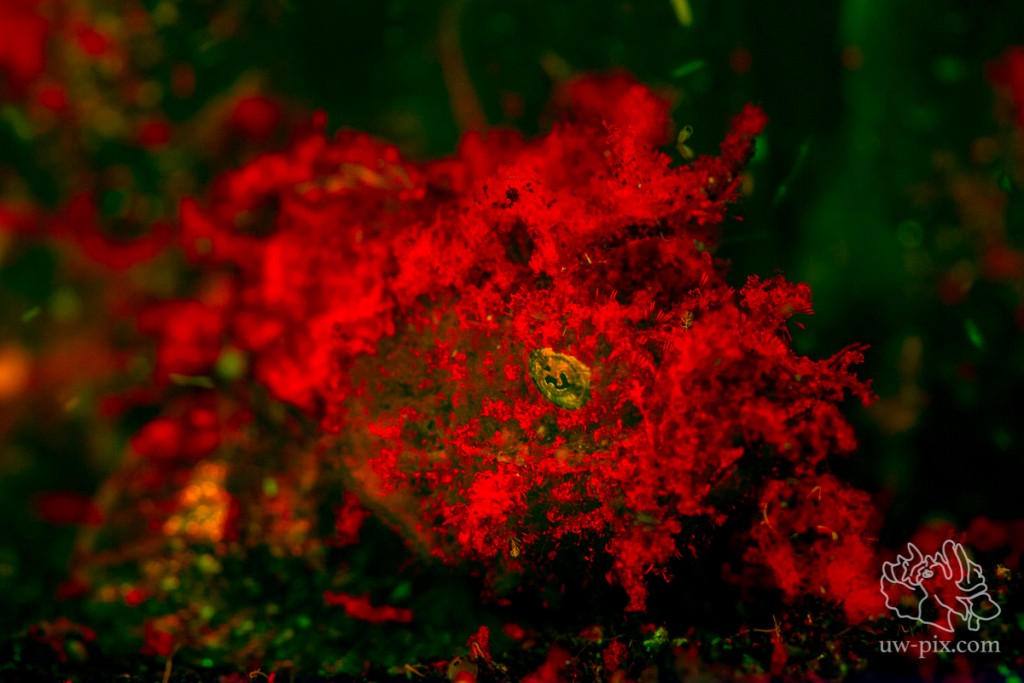
This is a little scorpionfish with some algae growth on him…the scorpionfish itself is not fluorescent, it’s the algae! – Canon 7D, 60mm, ISO640, 1/30sec, f3.5, 1x i-Torch Pro6+, 1xi-Torch Pro 7 with fluorescence filter strapped over the light
With multiple UV lights and a wider lens (i.e. fisheye lens) it is possible to illuminate larger subjects:
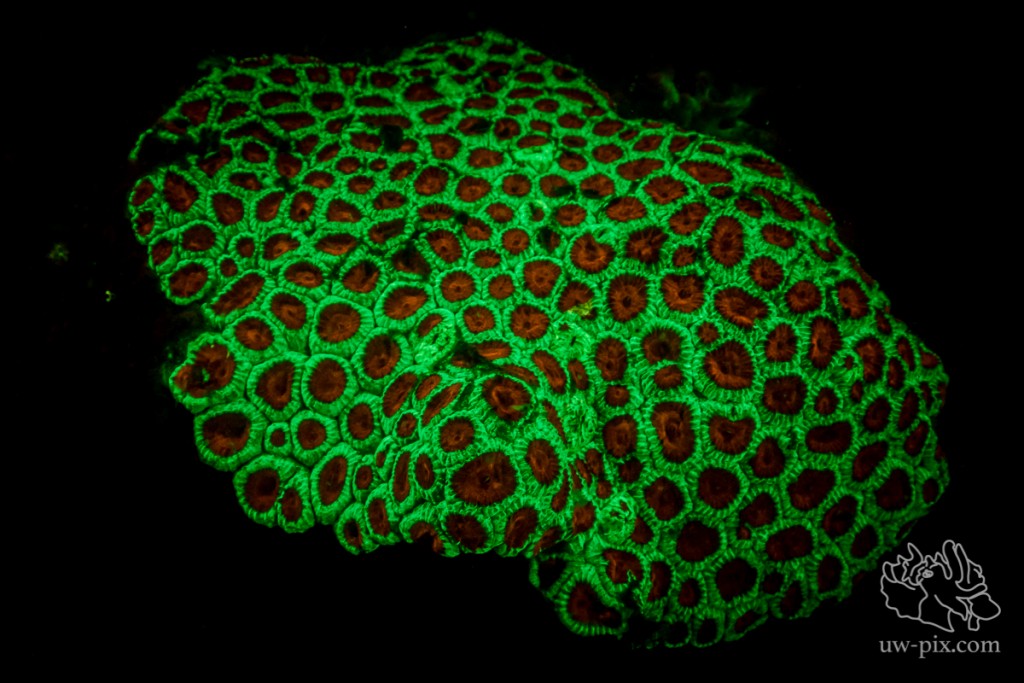
Favia coral – Canon 7D Mark II, Tokina 10-17, Kenko 1.4 TC, @17mm, ISO640, f7,1, 1/60sec, 2xi-Torch Venom 50, 2xi-Torch Venom 38, 1x i-Torch Pro6+

Reef-scene in UV view – Canon 7D Mark II, Tokina 10–17mm, Kenko 1.4x TC, @14mm, ISO 5000, f/5, 1/60s, 2xi-Torch Venom 50, 2xi-Torch Venom 38, 1x i-Torch Pro6+
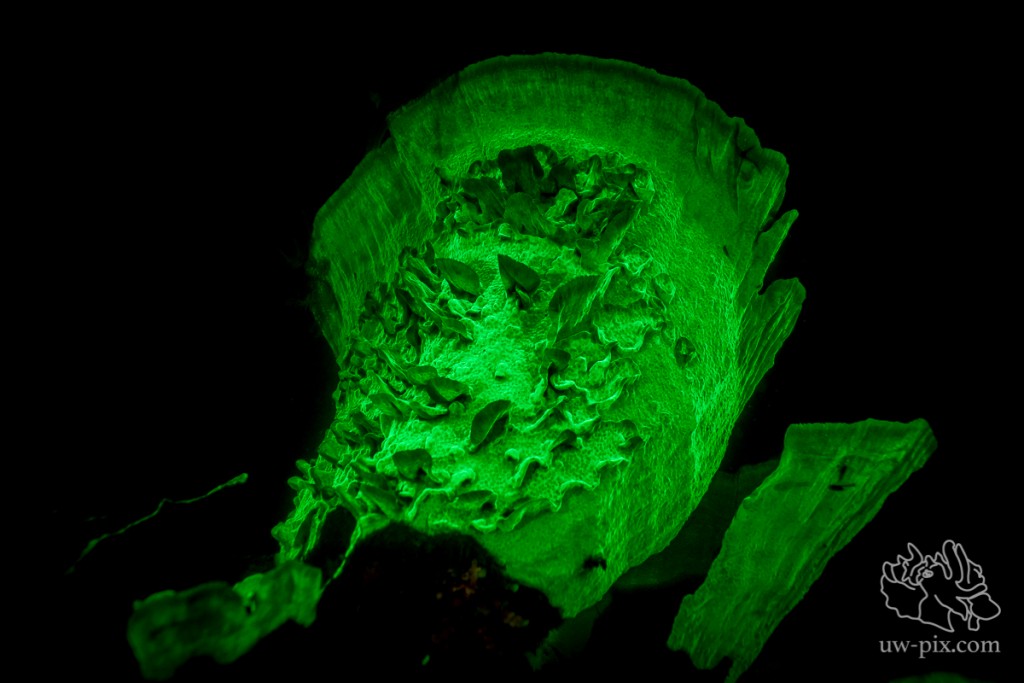
Hard coral (Montipora tuberculosa) – SONY A7 RII, SONY FE 16-35mm f4 ZA OSS @16mm, ISO2000, f4, 1/60sec, 1xi-Torch Venom 50, 2x i-Torch Venom 38, 1x i-Torch Pro6+
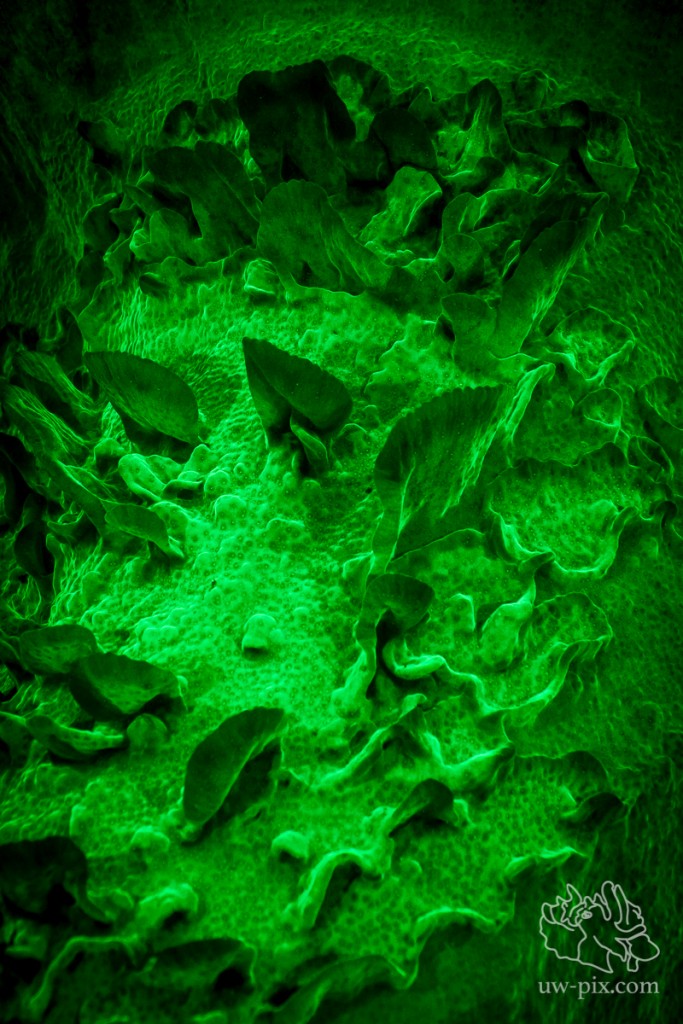
Close-up of above image
Hard coral (Montipora tuberculosa) – helicopter-shot – SONY A7 RII, SONY FE 16-35mm f4 ZA OSS @16mm, ISO20.000, f4, 1/60sec, 1xi-Torch Venom 50, 2x i-Torch Venom 38, 1x i-Torch Pro6+
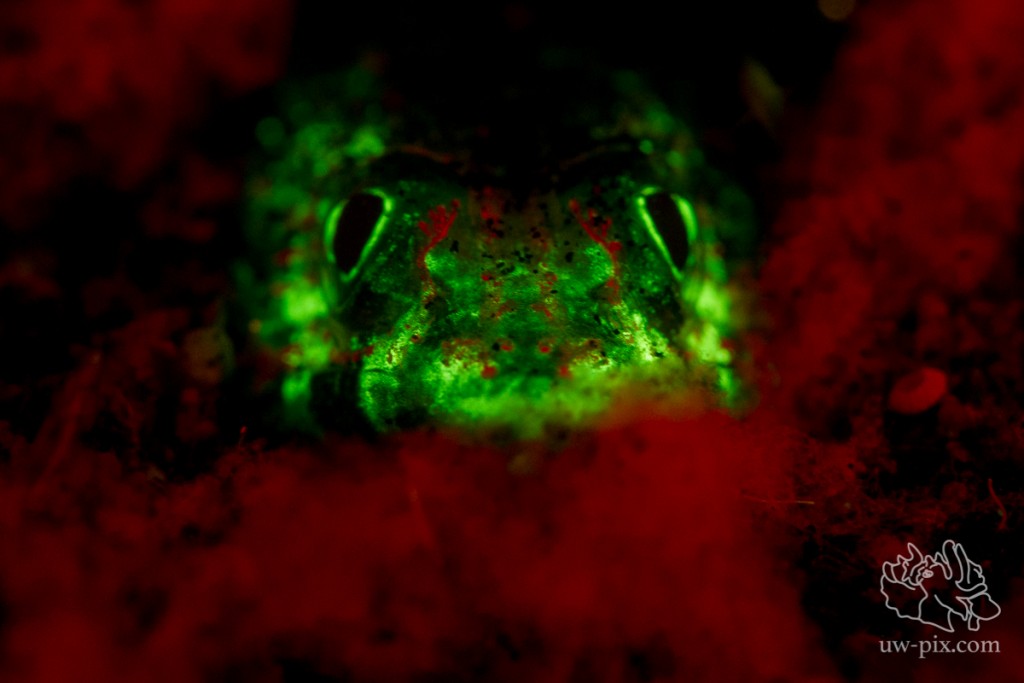
Scientists still don’t fully understand what purpose(s) fluorescence serves in marine life but theories propose that it may be for communication, as protection and to fool predators. Whatever the reason, it’s fascinating to discover and photograph a whole new side to fish, creatures, corals and anemones whose appearance changes radically under fluorescent light. See if you can discover fluorescence in an organism you never knew had it in them! Remember as always to be respectful of marine life and be cautious if you are using fluorescent lights on an animal, as some may have eyes which are particularly sensitive to that spectrum of light. Also keep in mind that if you are diving with UV lights, non-fluorescent coral is harder to see, so go slow and take care not to damage unseen organisms or habitat.
How to Photograph ‘Fangblennies’
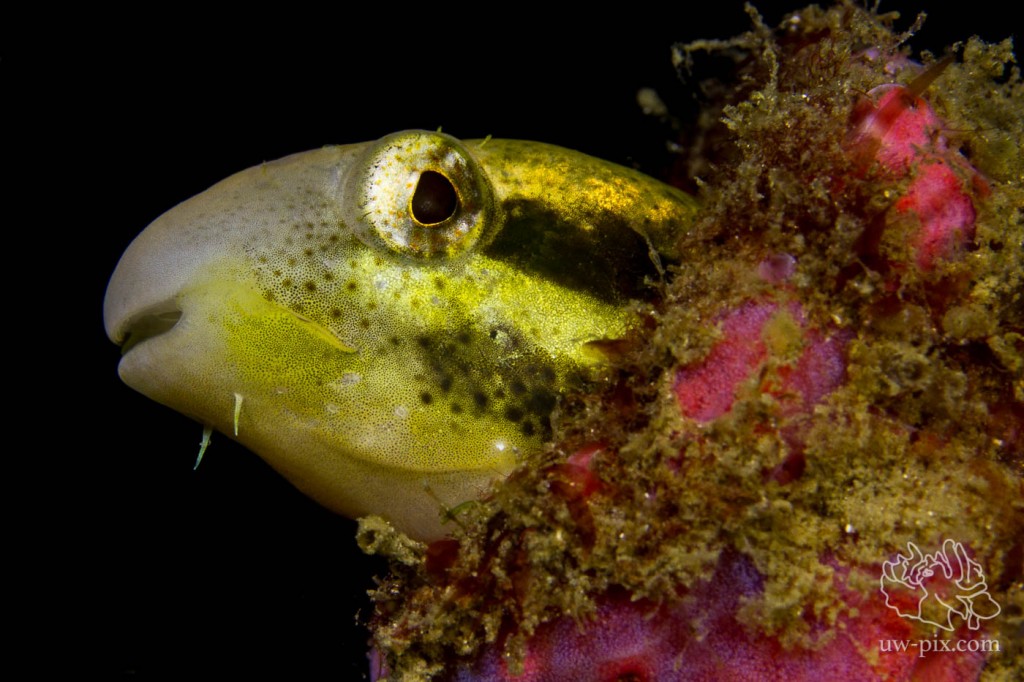
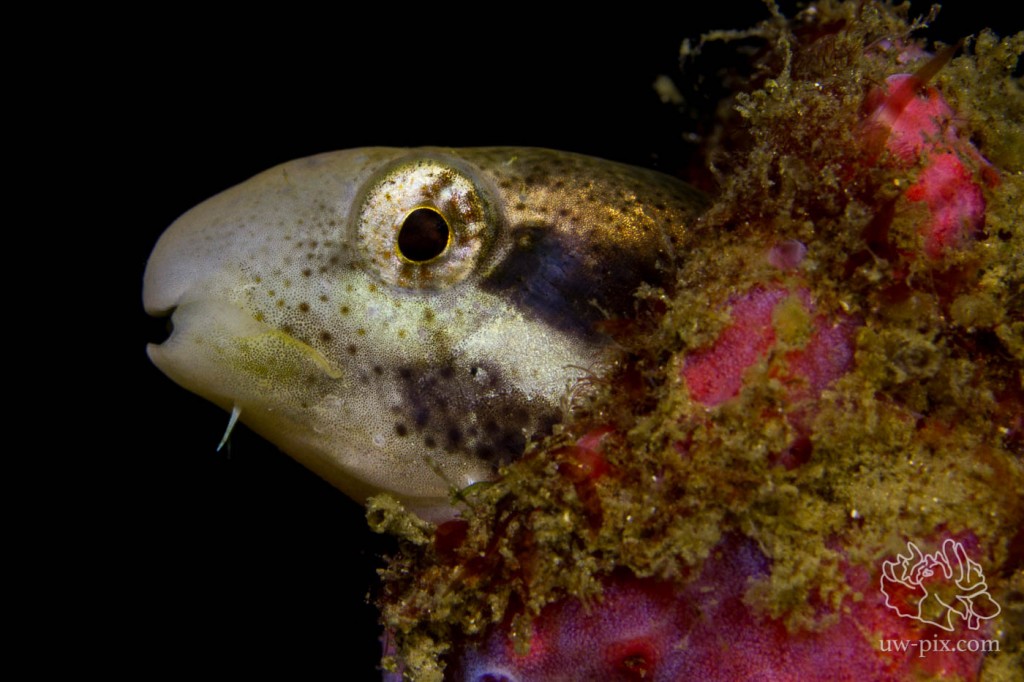
Fangblennies make interesting subjects as they often can be found in bottles where we can separate them easily from the distracting or unappealing background. They’re often under-appreciated as they’re relatively common in the mucky sites of the Lembeh Strait. Giving them a little bit of time to get used to the camera in front of them, they will pose for the camera very easily. Sometimes they even yawn! There are different opinions on why the yawning happens – either to display the impressively big mouth and scare away possible enemies, or to stretch the jaws, or just because they’re tired.
So here’s how to shoot them: Just get very close to fill the frame with the subject and then wait….at first they might hide in the bottle or hole they hang out in, but after a little while they will come back out. So take some test shots while they’re still in the bottle to get your exposure and background color right, after that is done you just have to wait until they’re in the right spot and then – bang!
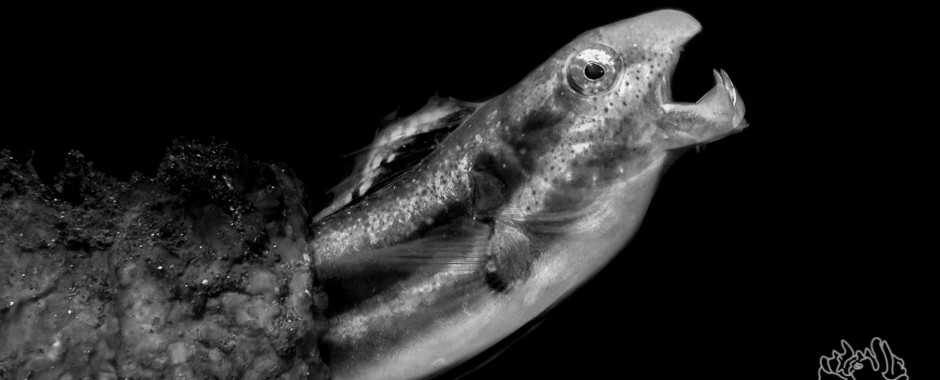
Being patient sometimes pays off – after waiting almost 20 minutes and firing at the exact moment of action, I got the lucky shot…Striped poison-fangblenny (Petroscirtes breviceps) – Canon 7D, 60mm macro, ISO 160, f16, 1/200sec, 1x INON Z-240 with DIY fiber-optic snoot
The two enlarged, grooved canine teeth for which fangblennies get their name are situated in the lower jaw. The fangs can get very large and while not especially dangerous to most people, fang blenny bites can be quite painful. Fortunately, because of its small mouth, envenomation of humans by this animal is unlikely. That being said, some of the species we see here in Lembeh have fangs up to 1cm long – I’m sure you heard that before: look, but don’t touch! The two most common species we have here are the striped fangblenny (Meiacanthus grammistes) and the striped poison-fangblenny (Petroscirtes breviceps), which mimics the former – they look very similar at first sight, but upon closer inspection you can tell the difference. Meiacanthus grammistes has a small blueish-black spot near the head.
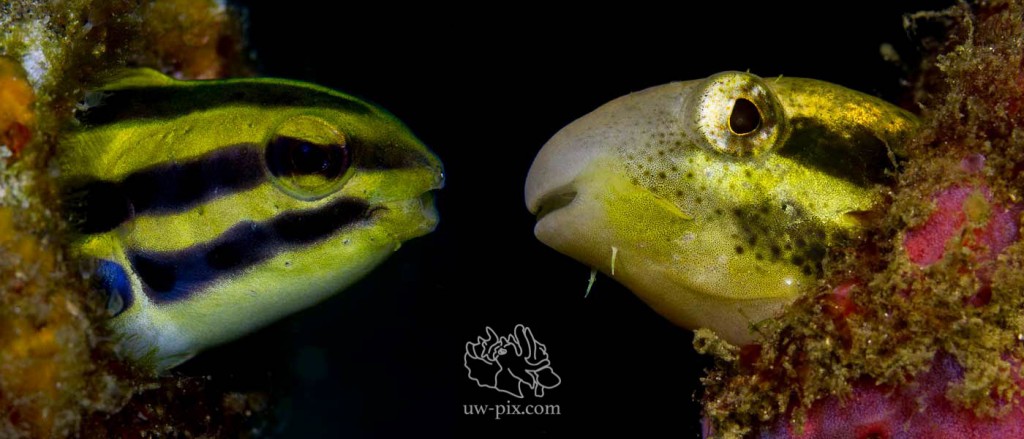
Meiacanthus grammistes (left) and Petroscirtes breviceps (right)
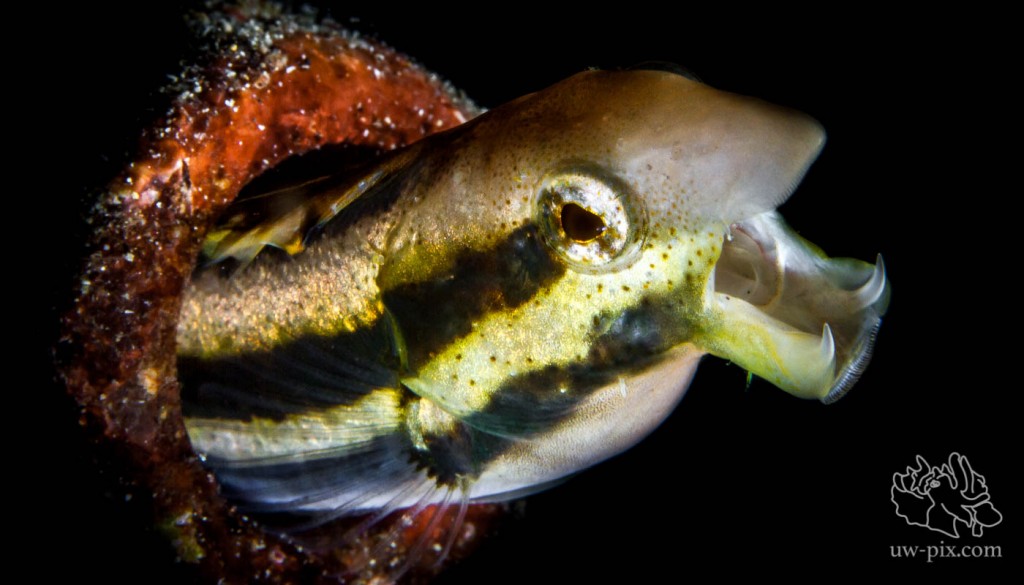
The striped poison-fangblenny (Petroscirtes breviceps) can also change color at will and sometimes you can get different images within seconds:
Petroscirtes breviceps – Canon 7D, 60mm macro, ISO 160, f11, 1/160sec, 2x L&M SunRay 2000
Petroscirtes breviceps – 7 seconds later and the yellow coloration is almost gone – same settings as above
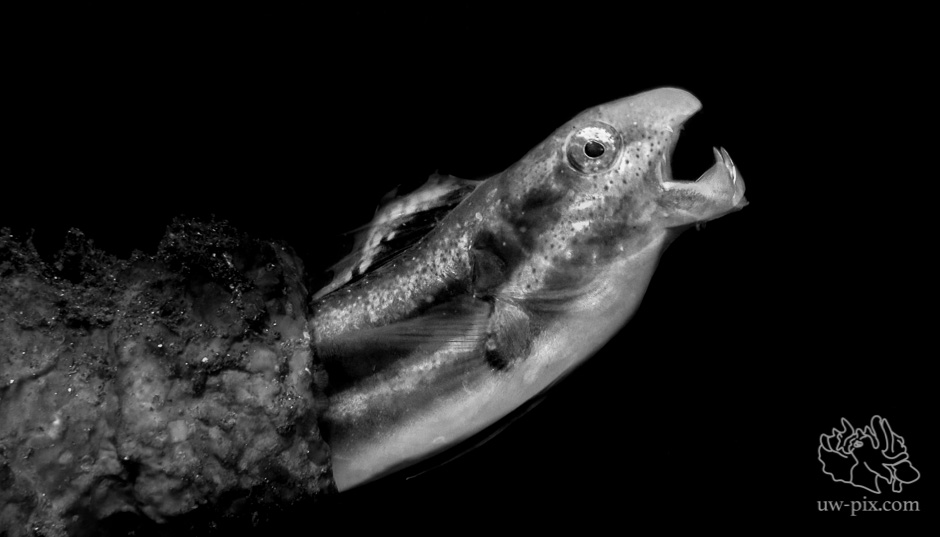
Sometimes fangblennies also make a nice black and white image – The striped poison-fang blenny (Petroscirtes breviceps) yawning for the camera (this is a screen-shot from footage shot with the SONY A7RII, 90mm macro lens)
When diving coral sites in Lembeh, we also often see the “smiling” bluestriped fangblenny (Plagiotremus rhinorhynchos) which mimics cleaner wrasses. This species can also change color at will, and can be orange as in the image below or display black and blue stripes to blend in with the cleaner wrasses. I like to shoot them with narrow depth of fields (low f-numbers) and by moving the strobe around, the coral they sometimes sit in can create dramatic shadows even without snoots.
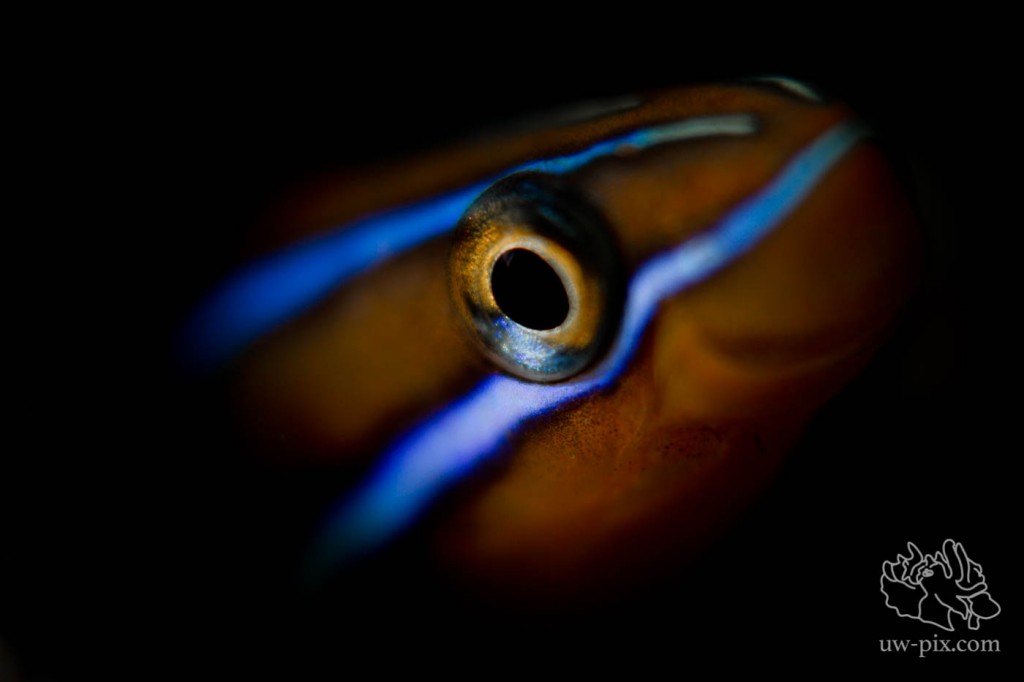
Plagiotremus rhinorhynchos – Canon 7D, 100mm macro, ISO100, f2.8, 1/250sec, 1x INON Z-240
Almost all of these fangblennies are not skittish and fairly large (around 10cm/3inches) so pretty much all macro lenses are suitable for getting good shots.
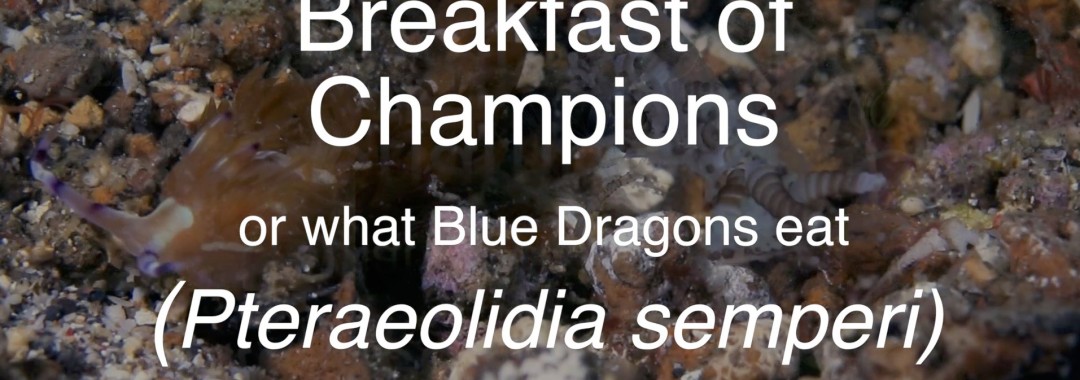
Critters of the Lembeh Strait | Episode 18 – 2015 | Breakfast of Champions
Check out this bizarre video to see one of the ways the Blue Dragon Nudibranch arms itself with a powerful stinging defence mechanism!
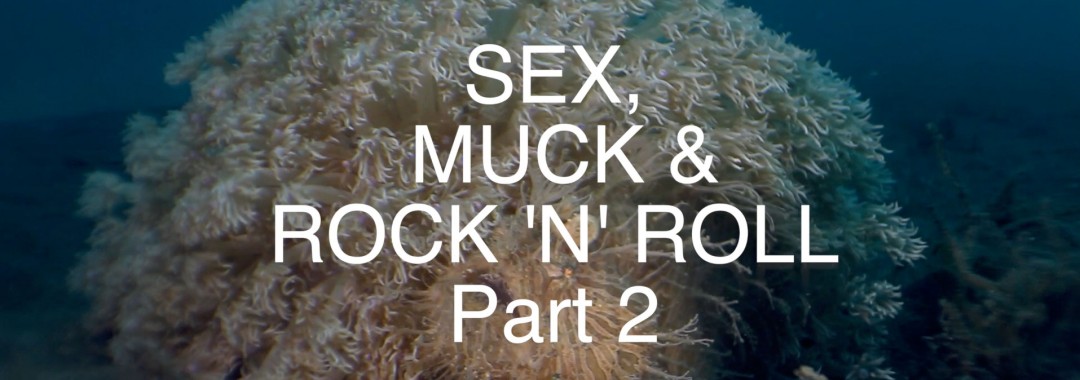
Critters of the Lembeh Strait | Episode 17 – 2015 | Sex, Muck & Rock ‘n’ Roll – Part 2
In the second part of “Sex, Muck & Rock ‘n’ Roll” some unusual mating behaviors are featured, starring blue-ring octopus, wunderpus, coconut octopus and also flamboyant cuttlefish, just to name a few, and watch out for the spectacular hatching blue-rings and flambos!
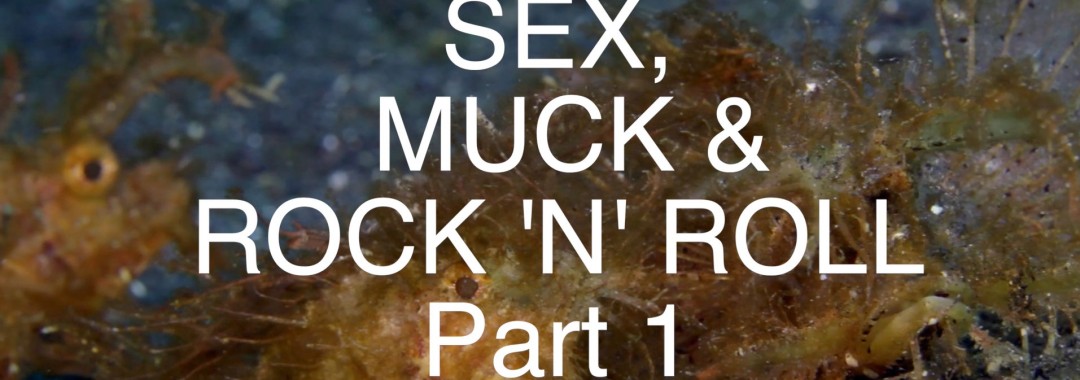
Critters of the Lembeh Strait | Episode 16 – 2015 | Sex, Muck & Rock ‘n’ Roll – Part 1
The rock stars of Lembeh get down, dirty and mucky in this video! The frogfishes like their ladies large, and as for nudis, they’ll do it with anyone – nudibranchs are all hermaphrodites and able to mate with any other individual of their species. Shocking, right?! Do they at least buy each other a drink? Be sure to stay tuned and find out!